


Rachel Ferreira, Beauty Editor.
You peeled the top coat off day three, not because you picked at it, but because a corner had already lifted while you were washing dishes. Now there’s a half-empty gel kit on the bathroom shelf and a question you’ve typed into a search bar more than once: why does the manicure at the salon last three weeks and the one you did at home barely survives a weekend. The honest answer has less to do with the polish brand and almost everything to do with what happens to the nail plate before the color goes on. A 2021 study in the International Journal of Cosmetic Science measured adhesion failure in gel systems and found that the single biggest predictor of early lifting wasn’t the topcoat formula at all, it was surface moisture left behind during prep. Fix that, and most of the rest falls into place.
- Prep decides adhesion, not brand: most early lifting traces back to oil or moisture left on the nail plate, not a weak polish formula.
- Curing time depends on pigment, not just your lamp: dark reds, glitters, and milky nudes often need extra seconds under the light that most people skip.
- Capping the free edge is the step most home manicures miss: running color over the very tip of the nail, not just up to it, is what keeps the edge from lifting first.
Why Gel Polish Lifts Before It Chips
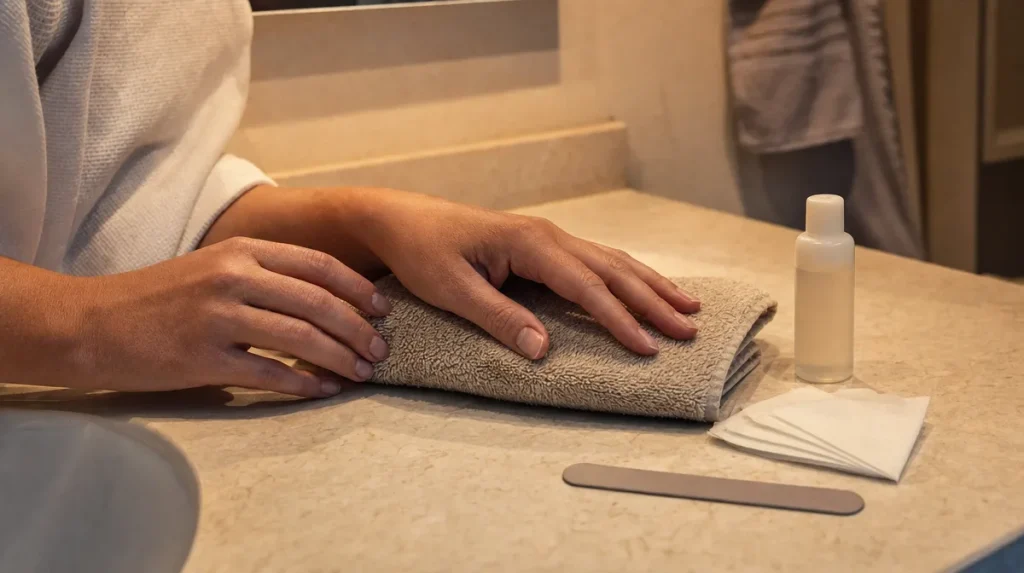
Regular nail polish chips. Gel polish, when it fails, tends to lift first, usually at the edges or around the cuticle line, and the chipping comes after. That distinction matters because it points to a different cause.
Think of gel polish less like paint and more like wallpaper. Wallpaper doesn’t fail because the paper itself is weak, it fails because the wall underneath was damp, dusty, or greasy when the paste went on. Gel polish bonds to the nail plate through a similar mechanical and chemical grip, and anything between the polish and the nail, natural oil, a trace of lotion, even the invisible moisture from washing your hands an hour earlier, weakens that grip at the exact point where it needs to be strongest.
This is also why lifting so often starts at the free edge and around the cuticle. Those are the areas most exposed to hand washing, dish soap, and friction, and they’re the areas easiest to under-prep because they’re harder to see clearly without good light.
Understanding this reframes the whole routine. A long-wear gel manicure is not really a question of which polish holds up best. It’s a question of how clean and dry the surface is in the sixty seconds before the first coat touches it.
Prepping The Nail Plate Like A Painter Preps A Wall
The prep sequence is short, but the order matters. Wash and dry hands first, then push back the cuticle with a wooden stick rather than cutting it, then lightly buff the shine off the nail plate with a fine-grit buffer, not to thin the nail, just to remove the glassy surface that keeps polish from gripping.
After buffing, wipe the entire nail plate with a lint-free pad and either isopropyl alcohol or a dedicated nail dehydrator. This step removes the fine dust from buffing along with any natural oil that has resurfaced. Skipping it is one of the most common reasons a manicure looks perfect on day one and lifts by day four.
A quick self-test while you read this: run a clean fingertip lightly across a freshly buffed, unpolished nail. If it feels the slightest bit slick or waxy, it isn’t dry enough yet. A properly prepped nail plate should feel faintly matte and slightly rough to the touch, almost like fine paper.
Do not apply lotion, cuticle oil, or hand cream in the fifteen minutes before polishing. It sounds obvious once it’s said, but it’s the single most common accidental sabotage in home manicures, usually because the oil went on earlier in the routine and simply hadn’t been wiped away.
Matching Your Lamp To Your Polish
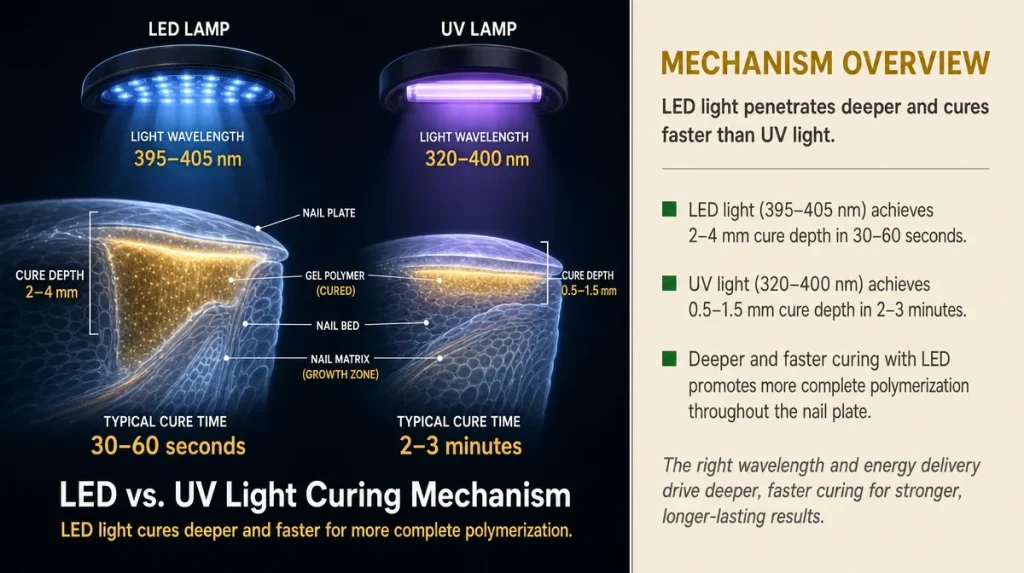
Not all gel polish cures at the same speed, and this has nothing to do with brand quality. Pigment density changes how much light penetrates the polish layer. Dark reds, true blacks, and glitter finishes are dense and often need extra time under the lamp. Sheer nudes and milky pinks cure faster because more light passes through.
The lamp itself matters too. LED lamps cure gel polish through a narrower, more targeted light wavelength and generally need less time per coat, often 30 to 45 seconds. UV lamps use a broader spectrum and typically need 2 minutes or more per coat. Using an LED-formulated polish under an old UV lamp, or vice versa, can leave the surface looking cured while the layer underneath stays slightly soft, a mismatch that shows up days later as a manicure that dents easily or peels in sheets rather than small chips.
A simple way to judge cure: after the recommended time, gently press a cuticle stick against the surface, away from skin. If it leaves any indentation or feels tacky, it needs another 15 to 20 seconds. This is worth doing on darker colors especially, since visual cues alone can be misleading.
The Cap Of The Free Edge, The Step Most Home Manicures Skip
Ask any nail technician what separates a salon gel manicure from a home one, and capping the free edge comes up almost every time. It means running the brush over the very tip of the nail, the white edge you’d see if you looked at your nail from the side, not just stopping the color where it meets that tip.
The reason this matters comes down to where water and friction hit hardest. Every time you wash your hands, dry dishes, or type, the free edge takes the most contact. If the polish stops just short of that edge, water works its way under the seam and starts lifting the coat from the tip inward, which is why so many home gel manicures fail at the tips first even when the rest of the nail looks flawless.
Capping takes an extra two seconds per nail and one deliberate stroke: after applying color to the nail bed, drag the brush lightly over the tip itself, sealing it the way you’d seal the flap of an envelope rather than just gluing the middle of it. Do this with the base coat, each color coat, and the top coat.
This single habit, more than any specific brand of top coat, is the difference reviewers and technicians point to when a manicure makes it to three weeks instead of one.
Cuticle Care Without Cutting Into Trouble
Pushing back cuticles is safe and useful. Cutting into live skin is where most at-home injuries and infections start, and it is also, somewhat ironically, a common cause of lifting, since any nick in the skin around the nail can weep slightly and introduce moisture right at the edge of the polish.
The safer approach: soften the cuticle with a small amount of cuticle oil or a warm towel, then gently push it back with a wooden or rubber-tipped stick. If there’s noticeably excess cuticle tissue, a professional can trim it safely with sterilized tools, but doing this yourself with cuticle nippers carries real risk, particularly around the sides of the nail where skin is thinner.
The American Academy of Dermatology’s public guidance on nail care specifically cautions against cutting cuticles at home, noting that the cuticle acts as a seal that protects the nail matrix from bacteria and fungus. Damage it, and you’re not just risking a rough-looking edge, you’re creating an entry point that can cause infection well before it affects how long your polish lasts.
A good rule for judging your own routine: if you’re reaching for nippers more than once every few weeks, cuticles are being pushed too aggressively or not moisturized enough between manicures.
The Mistakes Everyone Makes, And Why They Happen
Three mistakes come up again and again in home gel routines, and each one has a logical, almost sympathetic reason behind it.
The first is skipping or shortchanging the base coat, usually because it’s clear and feels like it “doesn’t do anything.” In fact the base coat is doing the adhesion work the rest of the manicure depends on, and applying it too thin, or curing it for less time than the color coats, is a quiet but common failure point.
The second is applying color too thickly to get full opacity in one coat. Thick layers cure unevenly, staying soft in the center even when the surface looks set, which shows up later as a manicure that dents or peels in sheets. Two thin coats consistently outperform one thick one.
The third is forgetting to wipe away the tacky residue layer that some gel top coats leave after curing. That residue is a normal byproduct of the curing chemistry, not a sign of a bad product, but leaving it on invites dust, lint, and premature dulling. A quick wipe with alcohol after the final cure resolves it.
None of these mistakes are about a lack of skill. They’re about steps that feel optional when you’re rushing, and aren’t.
Judging Results: When Three Weeks Is Realistic And When It Isn’t
A properly prepped, properly cured gel manicure can reasonably last two to three weeks with minimal lifting, according to guidance published by Good Housekeeping’s beauty testing team, which has evaluated at-home gel systems against salon benchmarks for wear time. That said, nail growth itself puts a natural ceiling on how long any manicure looks fresh, since new nail growth pushes the polish line away from the cuticle regardless of how well it’s adhered.
The useful distinction is between growth and failure. A small gap of natural nail near the cuticle after two weeks is normal growth, not a flaw in the manicure. Polish separating in a visible sheet, bubbling, or lifting at the tip within the first week points to a prep or cure issue worth troubleshooting before the next application.
If lifting shows up early and consistently, it’s worth checking one variable at a time rather than blaming the whole routine: was the nail plate dehydrated properly, was the free edge capped, was each layer cured for the full recommended time. Isolating the variable usually reveals the answer faster than starting over from scratch.
What Actually Matters Versus What’s Marketing Language
Packaging language around long-wear nail polish has gotten creative, and it’s worth learning to read past it. “Gel-like shine” or “gel effect” on a regular polish bottle means exactly that: it looks similar to gel, but it cures by air drying, not under a lamp, and it will not have gel’s actual wear time or resistance to chipping. True gel polish requires a UV or LED lamp to cure; if a product doesn’t ask for one, it isn’t gel chemistry, regardless of what the label implies.
Claims like “10-day wear” printed on a standard polish bottle describe a best-case scenario under ideal conditions, not a guarantee, and results vary widely depending on nail prep, hand use, and even the season. Dry winter air with indoor heating tends to dehydrate the nail plate and surrounding skin, which can actually help gel adhesion, while humid summer months can make nails slightly softer and more prone to early lifting at the edges.
The top coat matters less than most marketing suggests. A well-cured, well-capped manicure with an ordinary top coat will consistently outlast a manicure with a premium top coat applied over poor prep. If a routine has to choose where to spend extra care, prep and curing time earn it far more reliably than the specific bottle of top coat on the shelf.
Key Takeaways
A long-wear gel manicure lives or dies in the prep, not the polish bottle. Buff lightly, dehydrate thoroughly, and resist the urge to apply lotion in the minutes before polishing. Cap the free edge on every coat, cure fully rather than by feel alone, and treat cuticles gently rather than cutting them. Judge results by whether lifting happens early, which points to a fixable prep or cure issue, versus natural nail growth, which is simply biology doing its job.
A Quick Pre-polish Checklist
- Hands washed and completely dry, no lotion applied beforehand
- Cuticles pushed back gently, not cut
- Nail plate lightly buffed to remove shine
- Nail plate wiped with alcohol or dehydrator immediately before polish
- Each coat, including base and top, capped over the free edge
- Each coat cured for the full recommended time, checked with a gentle press test
- Tacky residue wiped away after the final cure
This article is for general information only and is not a substitute for professional nail or medical care.
Individual results vary depending on nail health, application technique, and skin and nail biology.