


Rachel Ferreira, Beauty Editor.
You are standing at the bathroom mirror at 7:40 in the morning, wand in hand, doing that back-and-forth wiggle you saw in a video once, and by the time you pull away your lashes look like they got caught in a spider web. There is a drawer somewhere in your house with four half-used volumizing mascaras in it, each abandoned after a week because the promise on the box (fuller, thicker, dramatic) never quite matched what showed up in the mirror. Here is the fact that changes most people’s technique on the spot: mascara does not make lashes thicker by coating them evenly, it makes them look thicker by building layers of pigmented polymer at the base and midshaft, which means where you apply the product matters more than how much of it you use. This guide walks through the mistakes that keep volumizing formulas from working the way they are designed to, and what to do instead.
- Wiggling the wand side to side does less than pressing it upward at the base, where most of the visible thickness is actually built.
- Pumping the wand in the tube dries out the formula faster than it fills the brush, which is why clumping tends to get worse over the life of a tube, not better.
- A light layer of translucent powder between coats can add real separation and hold, often outperforming a third coat of wet mascara.
Why Volume Is Built At The Root, Not The Tip
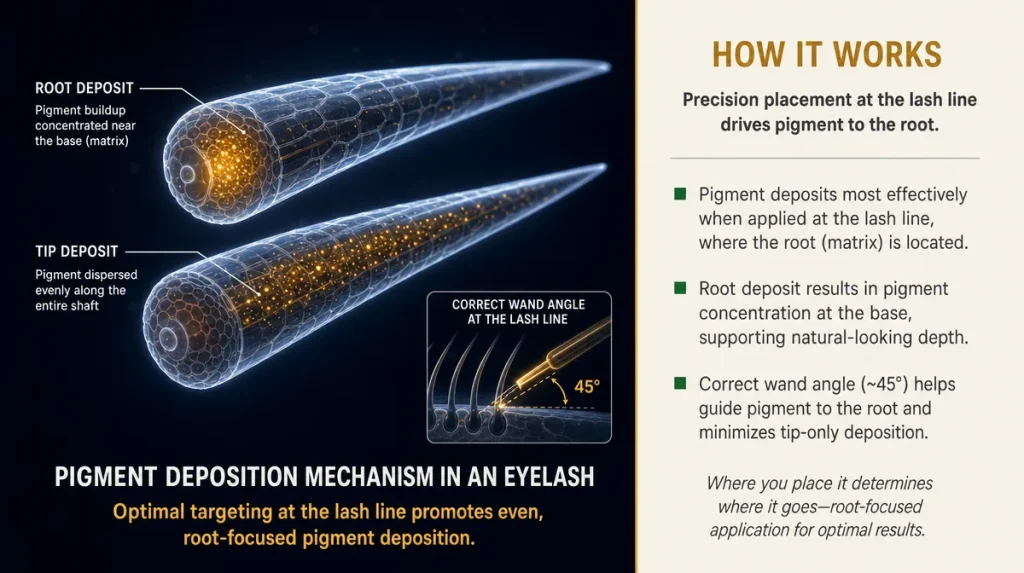
Think of each lash the way you would think of a single strand of yarn on a sweater. A sweater looks bulky not because the yarn itself is thick from end to end, but because of how many fibers are packed together near the base of the knit. Lashes work on a similar principle. The base, where the lash meets the lid, is where the eye reads density. The tip is thin by nature and will always look thin no matter how much product sits there.
A volumizing formula is built to deposit more pigment and polymer near that base if the wand is used correctly. Most people do the opposite: they start in the middle of the lash and drag outward, skipping the root entirely because it feels awkward to get the brush that close to the lid.
The fix is a wiggle-and-press motion starting at the base, angling the wand nearly parallel to the lash line for a second or two before drawing up and out. It feels slower than a single swipe. It is also the difference between lashes that look present and lashes that look coated.
The Clump Comes From Air, Not From Too Much Product
Almost everyone blames clumping on applying too much mascara. The more common cause is air getting whipped into the formula before it ever reaches the lash. Every time the wand is pumped in and out of the tube, air is pushed down into the barrel. That air dries the formula slightly and introduces small pockets of texture, which show up as clumps once the wand touches the lash.
The habit to break is the pumping motion itself. Instead, twist the wand gently as you pull it out, just enough to gather product without forcing air down into the tube. One well-coated pass beats three rushed ones.
A 2021 study in the International Journal of Cosmetic Science on mascara rheology noted that formula viscosity shifts measurably within minutes of repeated air exposure, which is a fairly technical way of confirming what most makeup artists already tell their clients: an older tube used correctly still often outperforms a fresh tube used carelessly.
Choosing A Wand Shape For Your Lash Pattern, Not For The Packaging Photo
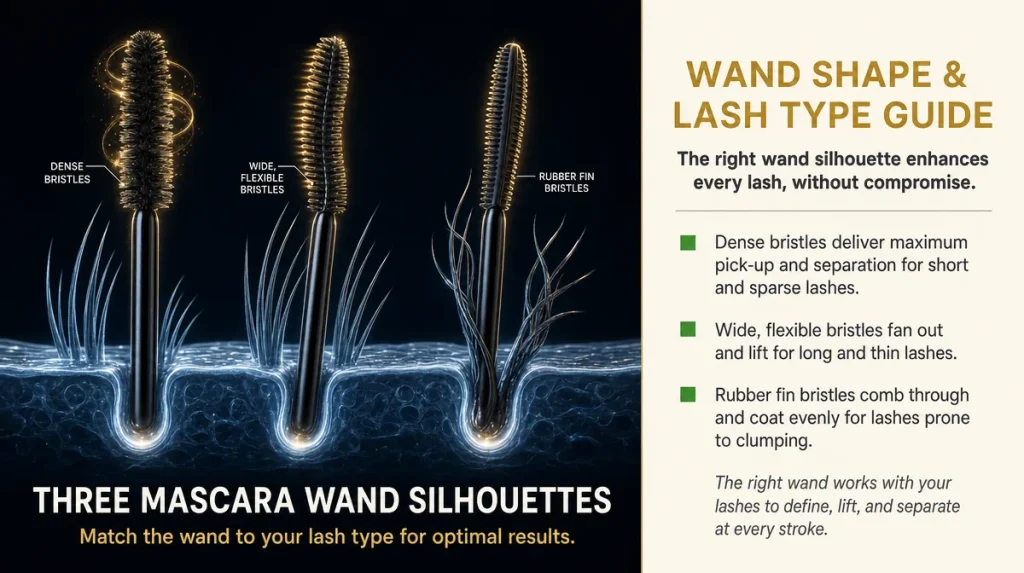
Wand shape decides more of the outcome than the formula label does, and it is the part most people skip past on the drugstore aisle. A tightly spaced, dense bristle wand tends to grab short or sparse lashes and add visible bulk. A wider, more flexible wand distributes product across longer lashes without overloading them, which matters if your lashes are already long but thin.
A rubber or silicone bristle wand separates as it deposits, useful for lashes that clump easily. A nylon bristle wand, the fuzzy kind, holds more product and suits lashes that need more buildup to register at all.
Hold the wand up before buying and look at the bristle spacing rather than the box art. If you have short lashes, look for tight, small bristles near the tip of the wand so you can reach the inner corners. If your lashes are already long, a wand with a slight curve helps lift instead of just adding weight.
Curling Before Mascara, Never After
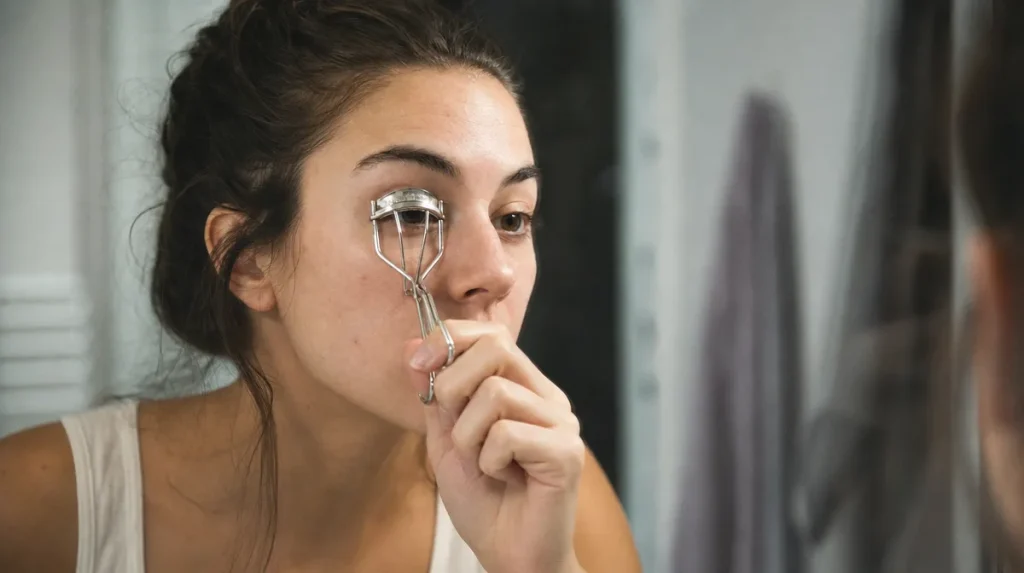
This one causes more damage than any formula ever could. Curling an eyelash curler on top of already-applied mascara traps the lash in a bent position against dried product, and if the mascara has fully set, the lash can crease or, in worse cases, snap off entirely at the curl point.
Curl first, on bare lashes, holding for about ten seconds at the base, then again briefly at the midshaft for a rounder curve. Wait a few seconds before applying mascara so the lash has settled into position. Applying wet mascara straight after curling can also pull the curl back down before it sets.
The American Academy of Dermatology has published general guidance on gentle eye-area care that applies here indirectly: lashes, like skin near the eye, are more fragile than they look, and repeated mechanical stress, including from a poorly timed curl, can contribute to breakage over time.
Judging Results At The Right Distance And The Right Light
Most people evaluate their mascara application two inches from a magnifying mirror under a harsh vanity bulb, which is the least representative view of how lashes actually read in daily life. At that distance, every fiber and every fine clump is visible and looks worse than it will from arm’s length in normal light.
Step back before deciding whether a look works. Check in daylight if possible, near a window, since indoor bulbs, especially warm yellow ones common in older apartments, can hide or exaggerate clumping depending on the color temperature.
A fair self-test: take a phone photo without flash from about a foot away. Camera lenses tend to flatten and compress detail closer to how another person actually sees your face across a table, which is a more honest read than the mirror.
Layering Coats Without Waiting Is Wasted Effort
A second coat applied while the first is still wet does not add volume, it just moves wet product around and often creates the clumps people spend the rest of the morning trying to fix with a lash comb. Mascara needs roughly twenty to thirty seconds to set before a second layer will actually build on top of it rather than blend into it.
A useful rhythm: apply the first coat to one eye, then move to the other eye while the first sets. By the time you return, it is usually ready for a second pass.
A light dusting of translucent setting powder between coats, applied with a small brush along the lash line only, gives the second layer of mascara something texturized to grip, similar to how a coat of primer helps paint adhere to a wall rather than sliding off a smooth surface. This trick has circulated in makeup artist circles for years and shows up in more than one Byrdie tutorial, precisely because it works on lashes that resist buildup.
Removing It Wrong Undoes The Whole Morning
Volumizing formulas, because they are built to grip and hold shape, tend to require more effort to remove, and scrubbing at that stage is where a lot of lash shedding happens. Rubbing a cotton pad hard across closed eyes pulls at lashes that are still anchored in the follicle, and repeated over months, that friction can thin out a lash line more than any single mascara ever could.
A better method: soak a pad with a gentle, oil-based remover, press it against closed lashes for ten seconds without moving it, then wipe downward once. Let the product dissolve the formula rather than trying to scrub it off. The Mayo Clinic’s general guidance on eye-area skin care notes that the skin around the eyes is thinner than skin elsewhere on the face, which is part of why aggressive removal habits show wear there faster.
If mascara still will not budge after one gentle pass, reapply the remover rather than pressing harder.
Reading Ingredient Lists Past The Marketing Claims
Terms like fiber-infused, buildable, or lash-plumping describe a sensation or a visual effect, not a regulated standard, so two products can carry the same phrase and behave very differently. What actually predicts performance is a shorter list: film-forming polymers (they hold the coat’s shape once dry), waxes such as carnauba or beeswax (they add rigidity and thickness), and pigment load (more opaque black tends to read as denser even before volume is added).
Fiber add-ins, tiny nylon or rayon threads suspended in the formula, do add length and apparent thickness, but they are also more prone to shedding onto the cheek by midday, something worth knowing if you wear contacts or have sensitive eyes.
A formula’s viscosity, whether it feels thick or runny on the wand, has more to do with how long it can build coats without clumping than any claim printed on the tube.
Key Takeaways
Volume comes from technique and wand choice more than from any single formula claim. Apply at the base with a press-and-wiggle motion, avoid pumping the wand in the tube, curl before mascara rather than after, and let coats set for thirty seconds before layering. Judge results from arm’s length in daylight, not two inches from a magnifying mirror, and remove gently with a soak-and-press method rather than scrubbing.
A Quick Checklist For Your Next Application
- Curl bare lashes first, hold ten seconds, wait before applying mascara
- Choose a wand shape based on your lash length and spacing, not the box art
- Apply at the base of the lash first, then draw up and out
- Twist the wand when removing it from the tube instead of pumping
- Wait twenty to thirty seconds between coats
- Try a light dusting of translucent powder between coats if buildup resists
- Step back and check in daylight before deciding it is done
- Remove with a soak-and-press motion, never a hard scrub
This article is for general information and does not replace personalized advice from a dermatologist or eye care professional.
Individual results with any technique or product may vary.